Welcome to Inkbunny...
Allowed ratings
To view member-only content, create an account. ( Hide )
Laughing Hammy
« older newer »
ElfenSciuridae
ElfenSciuridae's Gallery (578)

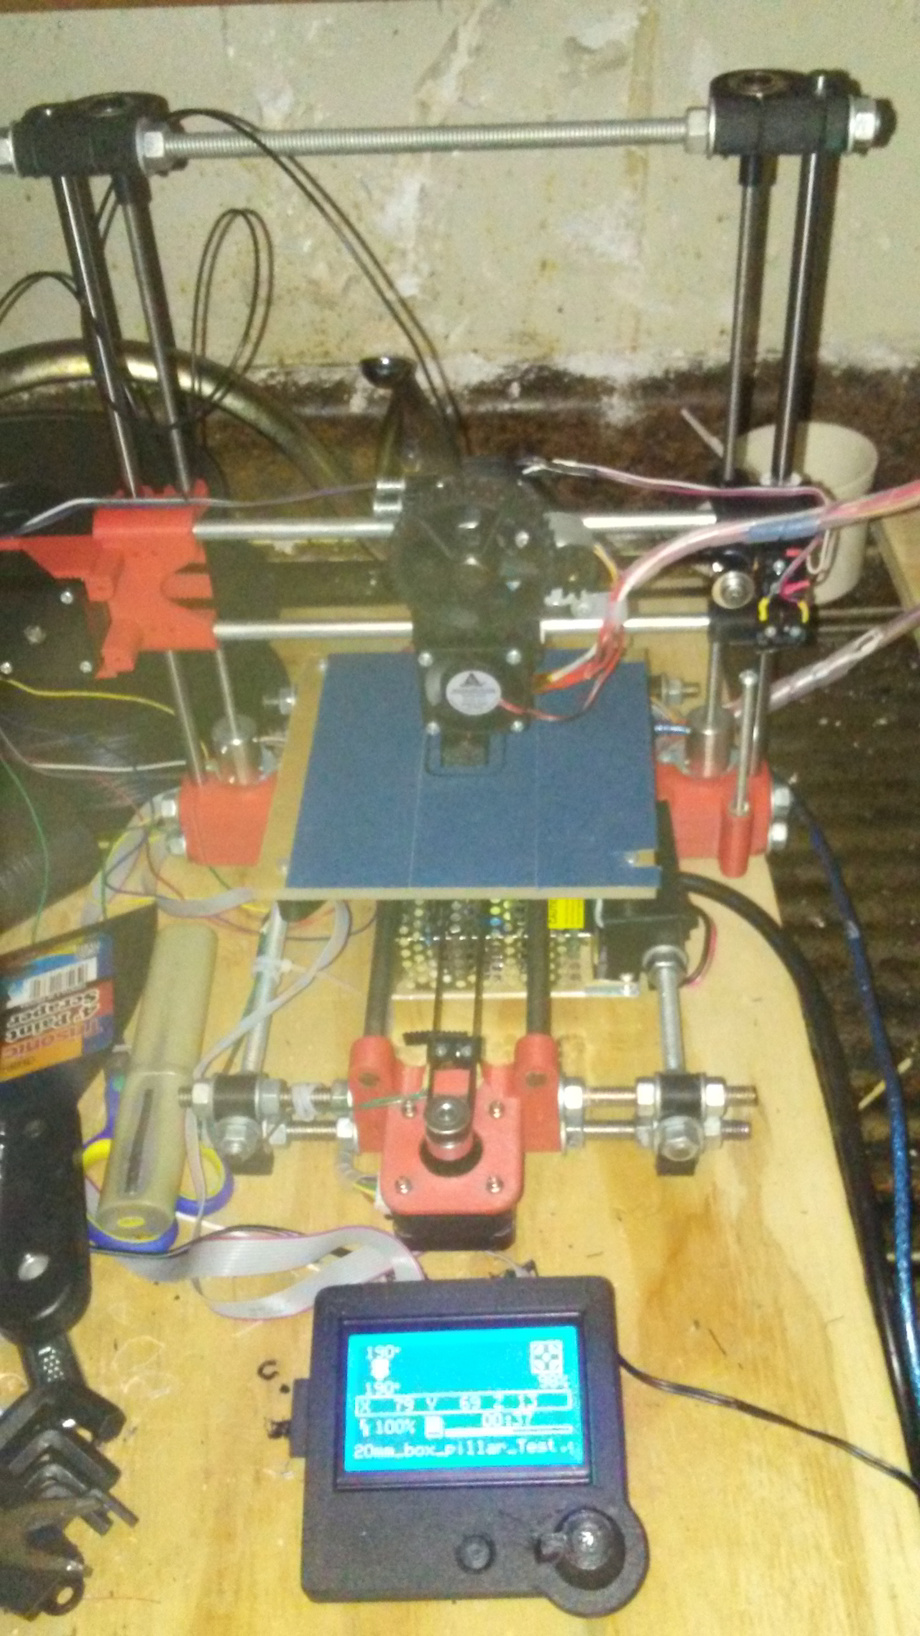
DIY 3D Printer Done and Working!

Fernando & Poki NYC Date

Medium (920px wide max)
Wide - use max window width - scroll to see page ⇅
Fit all of image in window
set default image size: small | medium | wide
Download (new tab)
WTF IS THIS?!!!
+2
Wavy Benchy Navy
Tried to upload the video but it would not upload. I may need to edit it to 1/2 a minute instead of a minute.

6 months of banging my head on this, replacing and upgrading parts, building and rebuilding parts, programming and reprogramming, and making 1000s of adjustment and it is finally working! There are still some issues but those are minor, and just need a simple parts change (using plastic bearings that wear out too quickly, I need to get metal bearings, that's basically it.).

I have to thank my friend Adam Vasquez (RIP:04/2019) for his help in the beginning in getting replacement parts when my first printer's electronics got fried by a power surge in the house. Without him I would have given up long ago.

When I get the video shortened, this post will be updated with its addition.

Keywords
Details
Type: Picture/Pinup
Published: 4 years, 4 months ago
Rating: General

MD5 Hash for Page 1... Show Find Identical Posts [?]
Stats
89 views
3 favorites
7 comments

BBCode Tags Show [?]
 
ThaPig
4 years, 4 months ago
Cool machine!
ElfenSciuridae
4 years, 4 months ago
Thank you!

If you are crazy like me, here is the instructions to build and modify it:
(The 3D Printer itself) https://www.thingiverse.com/thing:945156
(The modifications as listed the bottom on that page for Nema 17 stepper motors) https://www.thingiverse.com/thing:2412619

But I have been seeing 3D Printer prices crashing on Ebay, with the average low price being $89 for a large unit like an ANet-8 or Tronxy P802MA. I own the Tronxy P802MA and recommend it but it is a manual printer so you have to learn its issues (like manual Bed Leveling and Z/X Axis Alignment. Once you have it set, its a thing of beauty! It is my P802MA that made the parts for this tiny 3D Printer.
ThaPig
4 years, 4 months ago
Thanks! I'm crazy, but not too smart. I could not build one of those even if I could aford it.
NinoM4ster
4 years, 4 months ago
whoah, interesting!
ElfenSciuridae
4 years, 4 months ago
You can build it, it would take about $150USD in parts, sort of.
The rods, screws, washers and nut are easy to get. I will say mine is modified for 125X125X125 printing, the original is 100X100X100 mm volume. But instructions are there to modify to a larger size. Also I too the Nema-17 stepper motor modifications as well as the 28BYJ-48 steppers have issues with the new Merlin Software on the X and Y axis. They are fine with the Z Axis and the extruder.

Links:
Printer: https://www.thingiverse.com/thing:945156
Stepper 17 Upgrade: https://www.thingiverse.com/thing:2412619
Display Case: https://www.thingiverse.com/thing:2813298

The expensive part is the electronics; I managed to get 10 Nema-17 steppers for less than $40USD and 10 28BYJ-48 steppers for under $25USD. The RAMPS board, Arduino 2650 and Stepper Motor  Drivers you can buy all at once as a combo set for about $45USD, If you can find a "Discount Full Graphic Smart Controller" with the RAMPS/Arduino/etc. combo for $60USD or less. A V5 Print Head you can get complete for around $8USD or less. Gears and belts you can get for less then $10USD, and a set of Linear Bearings for about $2USD each. A 12V/5Amp Tiny PSU for about $12USD. All at Aliexpress.com. Also at Alibaba.com and Banggood.com

I do not know that rate for Brazil/China exchange so these are US Prices I paid for the parts.
NinoM4ster
4 years, 4 months ago
oh, no no... I'm not that smart  :)
ElfenSciuridae
4 years, 4 months ago
New Comment:
Move reply box to top
Log in or create an account to comment.